It's been far too long since I reviewed anything LEGO related, so I was very happy to accept a request from LeLightGo to look at their miniature LED LEGO lighting kits.
The sets come complete with everything you need, can be powered using USB or batteries, and everything is a tiny scale, so that it can be almost entirely hidden away inside your LEGO build... and it looks fantastic...
Most of my LEGO is currently in storage because of my move to Scotland and temporary accommodation, but this Winter's Christmas LEGO ICONS set #10325 the Alpine Lodge is right here, and an ideal candidate for lighting up.
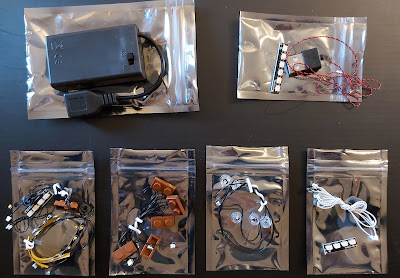
The parcel arrived and everything is inside a cute little box. The contents are packaged in plastic as you'd expect for electronics, but there's no obvious inessential packaging. My kit has 6 bags - 4 are numbered and opened in order as you progress through the instructions, and the other 2 bags contain the USB connector with wiring and connector strip, and the battery box.
There are no instructions in the box, which struck me immediately, as I have zero electrical skills. Chemistry or Biology generally makes sense to me, but electronics is not something I've really ever dealt with. That said, I know how to make simple circuits and understand current, so how hard can it be?
I referred to the website, which directed me to a massive list of all of the sets. You find your own in the list easily as they are in numerical order - and then you find virtually wordless, and nicely photographed image-based instructions.
I'll be honest, I was a bit thrown immediately, as the instructions told me before I do anything else, I should check all of the LEDs are working. I looked at my box with 6 small bags of electrical items and wondered where to begin? I opened the battery box and installed the 3 x AAA batteries. There is a standard USB connector as well, so you don't need batteries if you don't want to use them, but I preferred to have my model free to move anywhere. That bit was easy, and then I was (excuse the pun) in the dark.
There are very tiny plug in connectors, but it isn't clear where they go. LeLightGo have included a video tutorial for this bit, although it didn't answer my immediate question - what do I plug in to where? It turns out these are 'jumper connectors' (this may just be my partner's wording for them) and unlike electrical circuits, it actually doesn't matter where you connect anything or in which order you do it. Super simple - and quite exciting. I hadn't realised how easy it was going to be, or that the Christmas tree lights would be twinkling colours.
LeLightGo recommend you have a LEGO 'pick apart' tool and tweezers to hand because this is incredibly fiddly. I'd also recommend good lighting, such as a desk lamp, an excellent night's sleep and young eyes. Lights tested, it's time to start installing them into the model.
The first lights in my set are fixed into place with double sided tape. The first piece of tape came off when I tried to remove the backing, but it's excellent quality and actually was as easy to fix on and then attach the lighting strip as the other pieces, which I did properly. It went on really well and looks fantastic.
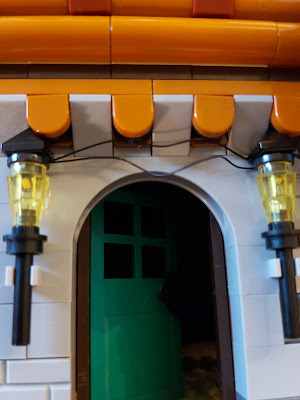
Now it gets a bit more tricky. The lights either side of the door need a little adjustment to sit in the right place, and then you need to prise the bricks apart slightly to tuck the wire into the gap and hide it.
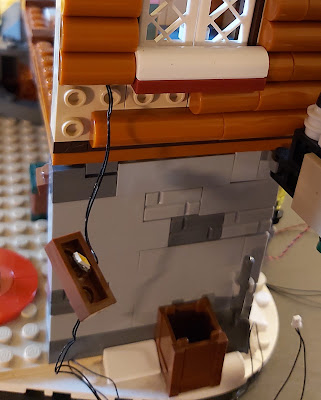
After the door lights you fit the ceiling lights - this is where a lot of younger builders would lose their patience. You need to pull apart your model to fit the lights in a subtle way and hide the wiring. Some things, like lifting off the chimney or removing plates and decorative coverings, are easy. Other instructions leave you needing 3 more hands while holding the most unstable piece of LEGO ever. I had it to the point where I was just being careful with the wires while slotting the top 2 floors back on, and then I had a table top full of loose LEGO. Darnit.
Be careful at that point, your LEGO building is now a bit 'craggled'. Some parts are joined together by the lighting wires, and you don't want to break anything.
Rebuilding is easy to work out with the LEGO instruction booklet and the photos on the LeLightGo instructions, but it's tricky to actually do, because you can't just put a section down on the table when a wire passes along to another part of the build. This part of the (re)build took twice as long as fitting all of the lights themselves, so allow for some frustrations and be glad if you manage without.
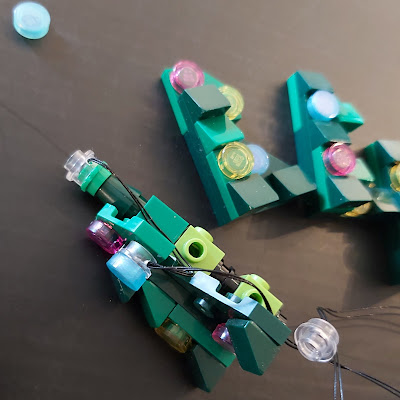
House completed and I'm very pleased. Onto the Christmas tree. You have to dismantle the tree and all of the wiring is then hidden within the tree, and it's incredibly quick to do.
The final section of the 'Classic' build is lighting the ice rink (you can also get a Remote Control version which has additional steps). There is some really clever use of the gaps in between bricks and plates in order to 'secretly' light the model, as well as hide the wiring.
The little bank of sockets fixes via double sided tape, and actually looks like a regular miniature bank of sockets. It's a great touch.
All that's left to do now is power it up...
And wait until it's dark...
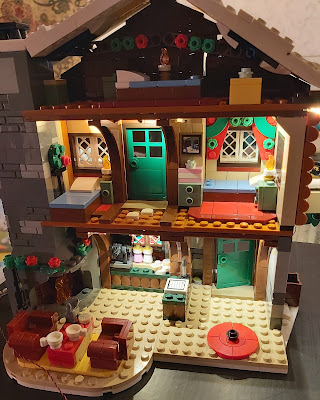
It's just gorgeous. The lights work so well, they really enhance the model, and I was reminded exactly why I love taking photos of LEGO. The lodge really comes to life.
This is a really fun set of lights and it is very nicely thought out. Each room has a ceiling light, the outside of the house has white fairy lights, the Christmas tree has twinkling coloured lights, and the ice rink has fantastic concealed 'underwater' lighting. It's beautiful, and has taught me a lot about modern electronics - mostly that it can be far smaller and much more robust than the circuits I made in school.
You can only see the wires if you look, and even then much of it is hidden away completely. A bit of extra care and attention, and I'll have hidden just about everything. There are a couple of places when I felt I'd taken some of the build apart and replaced it, only to find the instructions called for me to remove it again, and removing both upper floors of the house without it collapsing is challenging. The rest of the construction is incredibly easy, so overall, even with my rebuild taking a while, it was still very rewarding indeed, and it looks fantastic.
If I had any complaints then I'd say it's a shame there's no light for the outside toilet, but realistically you'd probably take a torch. I think many of the LEGO buildings would come apart far more neatly than the Alpine Lodge to fit the ceiling lights, so I'm happy this one is done and expecting the next to be a lot more forgiving!
LeLightGo sent me my lighting kit to review, and I think its great. The language-free photo instructions are very clear, and all of the electrics are neat and cute. Everything is excellent quality and very well designed. It has an impressive and varied effect, yet is barely visible. These lights definitely enhance your model and we'll be buying more before next Winter, because its something I've always wished existed and wasn't clever enough to create by myself, and the price is very reasonable indeed.
LeLightGo have all kinds of kits, including hundreds especially designed for specific LEGO sets, and options including sound and remote control. At the time of typing they have a sale, and my Alpine Lodge kit is on offer at £23.99 (rrp £30.99). I think it's a very fair price and is a lot of fun, and it is really beautiful to look at.
We were sent our LeLightGo LEGO Alpine Lodge lighting set for review. I wasn't paid to review, and have given my own genuine opinion. The photos speak for themselves...







No comments:
Post a Comment
Thank you for taking the time to leave a comment. I read every one and try my best to reply!